Thursday, December 14, 2017

Project Life Dare to Dream - Feed your Craft

Hi girls! I'm happy to be sharing with you a new project with the amazing products from Feed your Craft! This time, I've created a Project Life page with the Pattern Play kit and some more stamp sets and mini flair!   


For the central card, I decided to go with a bold title in black on top of a colorful patterned paper! I used the Marker Alphabet Stamp and Bold Alphabet Stamp sets combined with a little bit of hand lettering.


And what can I say about the diecuts, puffy stickers, chipboard shapes and the adorable mini flair! In this case I used the Camera Mini Flair set, which are perfect for any kind of memories! And the diecuts and puffy stickers are so versatile and cute! 


Finally, I added some phrases stamping the Daily Doings Stamp sayings on some bright papers and using them as a phrase stickers! It's a really good solution when you want them to match perfectly your project. 


And here, you can see the entire page! I couldn't help adding lots of color to the page and I really love the result of it! 


You can see that it's so easy to create a page using the gorgeous kits from Feed your Craft! Hope you liked it! 

Best wishes! :D

Thursday, November 9, 2017

Project Life Dreams - Feed Your Craft

Hello everyone! How is your week going? I've been  quite busy these days but I could find some time to get this page together! It was so refreshing and the perfect way to get away from the daily workload!

To create this project I mainly used the Highlights Stamp and The Story Stamp sets from Feed your Craft and some cards from Studio Calico!


The focal point of the layout is the card on the next picture where I stamped a quote I love with the perfect stamp set!


You ca see that it is so easy to create your own embellishments or phrase stickers with the word stamps from feed your craft! personalize it to fit your projects!


And here you can see the entire page! I love the combination of the blues and purples that match my pictures, but these stamps you could transform it to fit all of your memories!


I hope you liked this page as much as I enjoyed to create it! Just have fun crafting with all your stamps and papers! Best wishes! ^^

Tuesday, September 26, 2017

Project Life Hello Summer! ^^

¡Hola a todas! ¿Cómo van los primeros días de otoño? Yo aún me estoy haciendo a la idea de que las vacaciones ya ha acabado y más con el modo verano on en mi mesa de scrap! y es que son tan preciosísimas las colecciones de verano que yo las utilizaría todo el año. :P


Y aquí os traigo dos páginas de mi álbum de Project Life que he hecho de aquellos maravillosos días de verano! Y cómo no podía ser de orta forma, he usado los papeles de la colección Perlora de Lora Bailora! Són muy perfectos y alegres y llenos de vida y de color! Supongo que es por esto que no pude resistirme a comprar toooodos los productos, papeles grandes y pequeños incluidos! ^^


Aquí podéis ver la primera página, en la que también he usado otros materiales varios para complementar los papeles y die-cuts de la colección Perlora.


Me encantan estas páginas con tanto color, cuando abres el álbum y te aparecen te dan muy buen rollo y los recuerdos parecen aún mejores de esta forma! :D


Para la siguiente página he utilizado algunas de las tarjetas recortables de la hoja grande. Además, he añadido algunos elementos de madera de Gigi et Moi que quedan perfectas para éstas páginas! :)


¿Y vosotras como vais con vuestro Project Life? La verdad es que yo no sigo ningún orden sino que intento tener las fotos más o menos al dia en las fundas y cuando me apetece hacer un poco de scrap escojo cualquiera que me inspire en aquel momento! ;) Contadme vuestra experiencia! ^^


Espero que os haya gustado mucho y que os inspiréis para documentar vuestros momentos más preciados! Nos vemos muy pronto y ¡que seáis muy felices! ^^

Monday, September 18, 2017

LO Enjoy the Journey - Feed your Craft

Hi girls! ^^ How are you? I hope your week has started with lots of energy and happiness! :D
Today I bring you a layout I've created for the Feed your Craft Creative Team where I document the everyday moments on my way to college!


To create this fun layout I've used many different items, but the main elements are the Social Flair Flat Pack, some phrases from a variety of Stamp Sets and a few flairs! ^^


For this layout I decided to create a circle with all this elements that frame the picture and give the whole page a magical touch! ^^


The background is this beautiful ombre paper from the collection Oasis by Crate Paper! The colors are beautiful and match my picture pretty well! :D


Finally, you can see that I added my title with some letters that coordinate with all the other colors of the little embellishments I've added throughout the page!


And that's the entire page! I hope you like it and I encourage you to create some pages documenting you everyday moments!

Best wishes! ^^

Sunday, September 10, 2017

Project Life Happy Weekend - Citrus twist kits

Hello everyone! :D I'm so excited to be sharing with you today my first Project Life page using the Citrus Twist Kits! ^^ I've been loving these kits for a long time and I finally made the decision to buy them and I've got to say that they are even better than expected! There are lots of embellishments, cards and papers that combine perfectly and work so well with any topic you'd like to scrap! Here you can take a look to all the beauties from the July Pocket Life Kit. :D


Fot this page I decided to go with red, even though it's my least favorite color. But that central card was too perfect not to use it! And I need to tell you that I really like the look of the page with this color and I'll be probably using it more!


For the title card I used some of the 6x6' papers in grey and red, some beautiful letters in gold and just a diecut from the pack and two labels from the cut appart sheet. I love how these colors look together!


For the rest of the page I just needed two more cards, the one in the middle was the first I chose and the one that make the rest of the page come together! For the card on the bottom I just used a plain card in grey that made the picture stand up a bit more.


Once the cards where on it's place I only had to pick some of the amazing embellishments and I didn't need anything else! I was an easy page to make because I wouldn't have to go through all my stash and the colors where already matching. So simple! 


And here you can take a look at the whole page, I love all the little embellishments and the brightness of the cards and the colors! Also, the little stamp set is awesome to add some final touches to the page! ^^


I hope you liked this page and that you could see this kit in detail! I had so much fun working with it and I encourage you to have a lot of fun documenting your memories too! Also, stay tuned because I'll be sharing more pages with these kits! 

Best wishes! :D

Wednesday, August 30, 2017

LO Transparencias - Reto In the Scrap

¡Holaaa a todaaas! ^^ ¿ Como han ido las vacaciones? Septiembre está aquí mismo pero no debemos estar tristes por ello, ahora es el momento de scrapear todas las fotos rebonitas que hemos hecho y celebrar lo que hemos vivido! :D
Así pues, os traigo este proyecto súper veraniego que he hecho principalmente con la colección Perlora de Lora Bailora que no podria ser más perfecta! ^^

Hi everyone! ^^ Did you have some nice holidays? I know September is just right here but we can't be sad about that because now it's time to scrap all this photos and celebrate what we've lived! ^^
So, here I amb with a very summery project I've created with the amazing collection Perlora by Lora Bailora


Además, me lo he pasado muy bien creando estas ventanas interactivas que me van perfectas para participar en el reto de Agosto de In the Scrap! :P

Morover, I had so much fun creating these interactive windows that fit perfectly for the August challenge by In the Scrap! :P 


Para el título me he decidido a usar dos tipografías diferentes con detalles dorados, las letras en azul son de la colección navideña Oh Joy de Pinkfresh Studio (que ya veis que van perfectas para cualquier ocasión) y las blancas son de la preciosa colección C'est la vie de Pink Paislee. :)

For the title I chose two typographies with some details in gold. The blue one is from the collection Oh Joy by Pinkfresh Studio and the other one is from the beautiful collection C'est la vie by Pink Paislee. :)


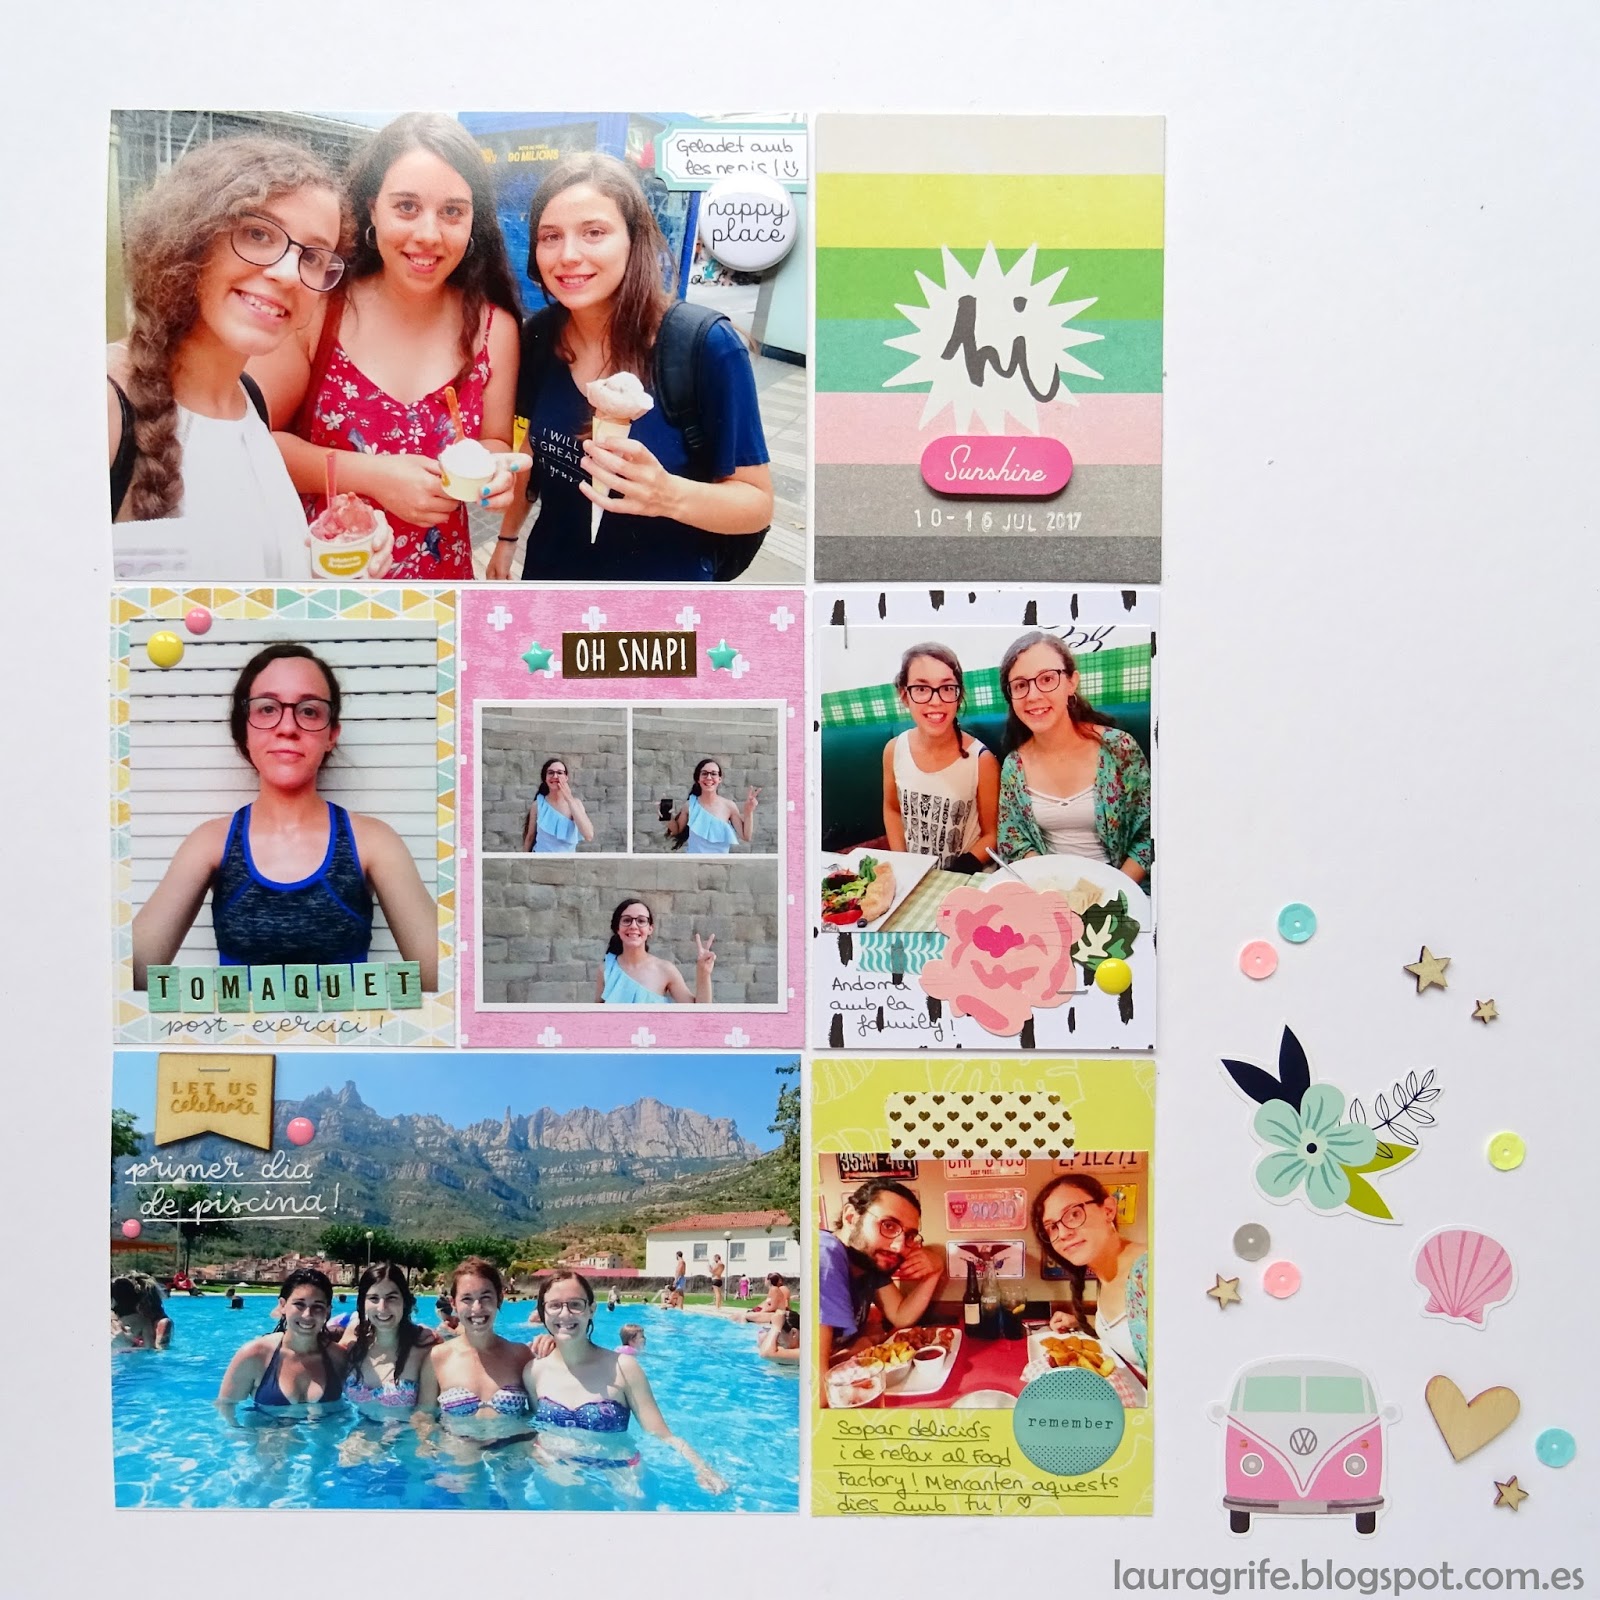
Para complementar los papeles y los diecuts de la colección Perlora de Lora Bailora también he usado otros elementos como pegatinas y maderitas de diferentes colecciones de Crate Paper, American Crafts, We are Memory Keepers y Studio Calico.

To match the papers and diecuts from the collection Perlora by Lora Bailora I used some stickers and wood veneers by Crate Paper, American Crafts, We are Memory Keepers and Studio Calico.


Me encanta que haya tantos detalles en la página pero que a la vez no se vea muy recargado. Y lo hace falta decir que los diecuts de la colección Perlora son los más perfectos para el verano, me tienen enamorada y los vais a ver seguro en muchos proyectos más! ;)

I love that there are so many details at the same time that they don't look overwhelming. I needless to say that the diecuts by Lora Bailora are the more perfect for summer and that you'll see them in many more projects! ;)


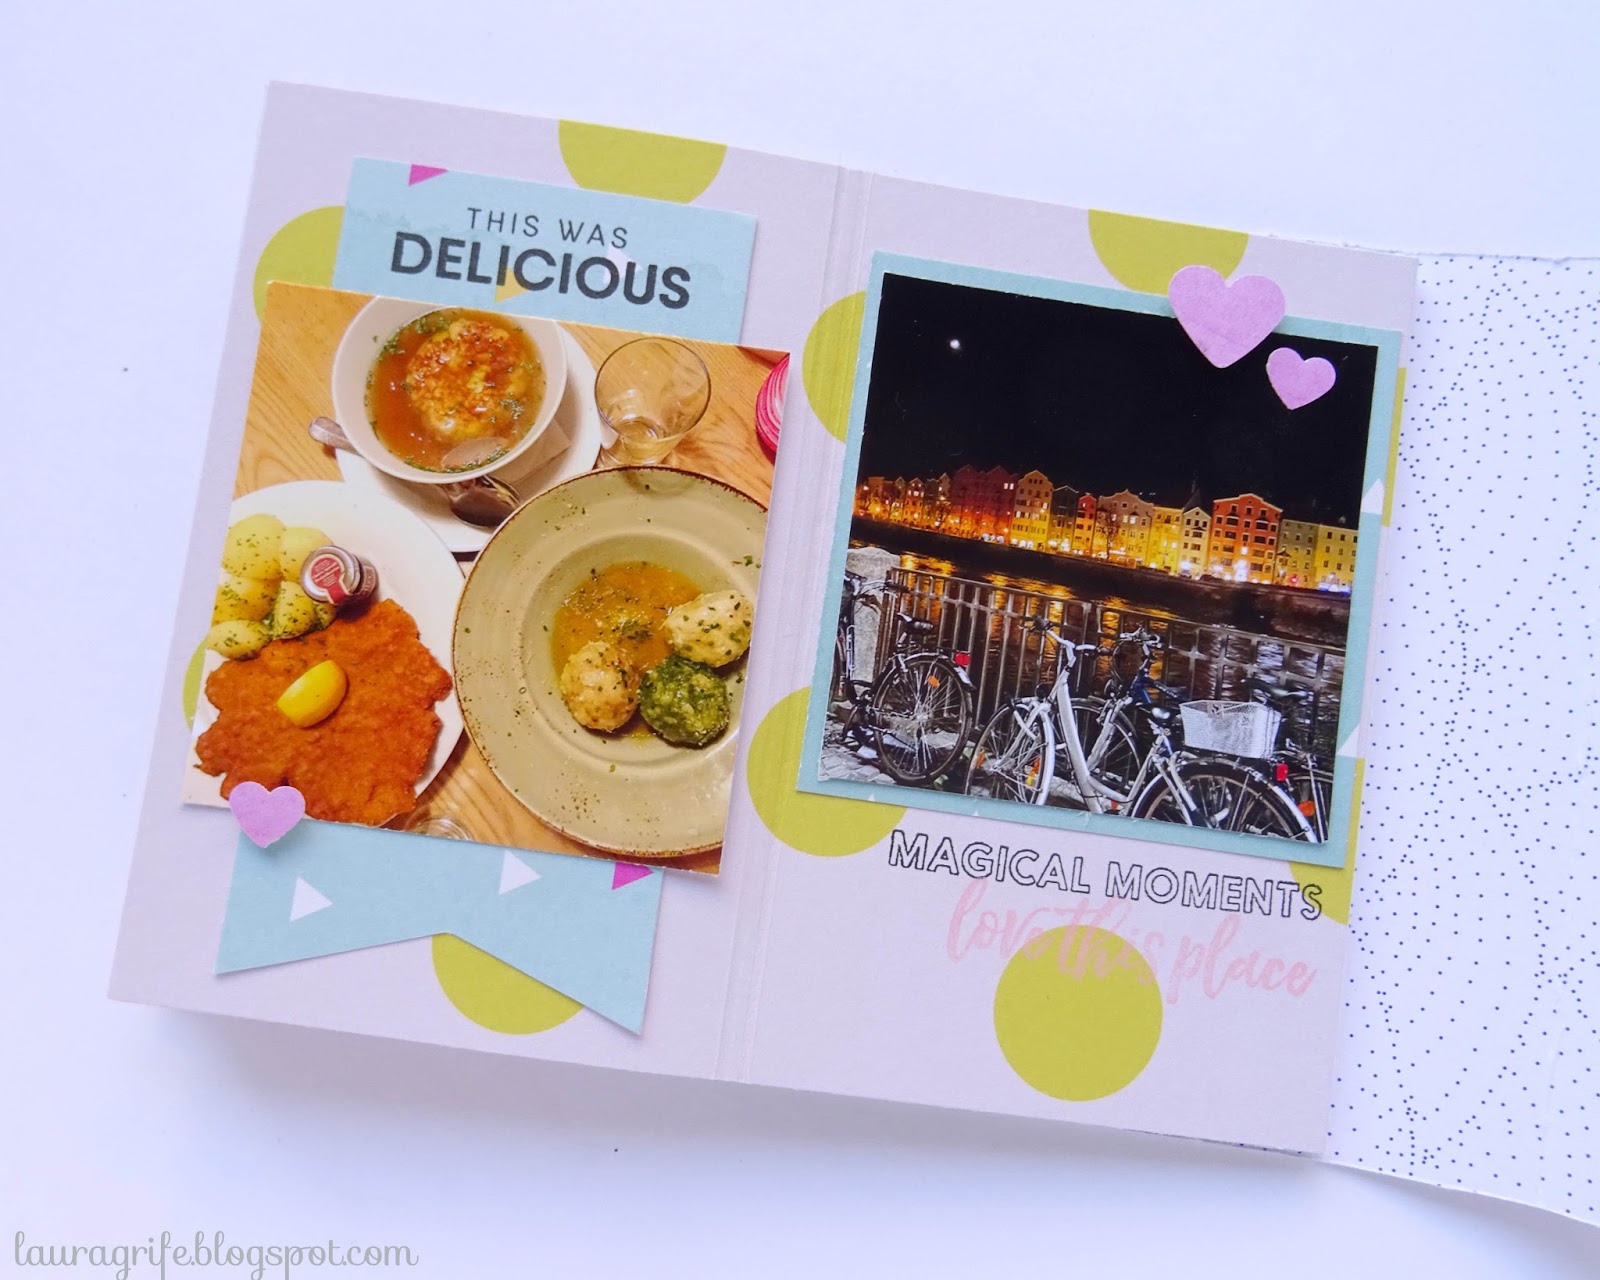
Y ahora viene el elemento principal de la página: las ventanas shaker! Para hacerlas recorté dos triángulos, uno en una esquina y el otro debajo de la foto. El plástico que he usado es simplemente una funda para archivador de las que todos tenemos en casa. jejej

And now, let's talk about the main element of the page: the shaker windows! To make them I cut two triangles one in the cormes and the other one under the photo. The plastic I used was some regular page protectors. :P


La parte más divertida y también con la que la lié más fue el relleno de las ventanas! :P Usé un montón de purpurina dorada y mis lentejuelas preferidas de Anita y su Mundo, que combinan perfectamente con los colores del layout. Una ves tuve todo dentro de las fundas (y también por toda la mesa) lo cosí con la máquina de coser para que quedara bien sellado! ^^ También seria muy chulo hacer lo mismo con alguna foto de la playa y arena de la misma! :D 

The funniest and messiest part came when filling the windows! I used a lot of gold glitter and the amazing sequins by Anita y su mundo. I put them inside the page protectos and sew it with my sewing machine! I would be awesome to use this technique with a beach foto and fill the pockets with sand, too! :D


Espero que os haya gustado mucho este layout y que os inspire a utilizar crear elementos diferentes en vuestros proyectos! ^^
I hope that you enjoyed this layout so much and that you get inspired to use different elements on your pages! ^^

¡¡¡Que seáis muy felices!!! :D 
Best wishes!!! :D

Tuesday, August 15, 2017

Handmade recipe book! ^^

Hi lovelies! ^^ Are you starving for some craftiness? Do you love experimenting on the kitchen and would like to keep all the deliciousness you make? If so, here you have some ideas on how to make your own recipe book, just like Julia Child! :P


To keep all my recipes together I picked a 6x8' album with page protectors so that it would prevent the splatters when cooking. Also, I love the structure of it and it be perfect to add one recipe for each page! ^^


For the cover, I had a lot fun creating a backgraound with white embossing and this gorgeous stampset by Brandi Kincaid for Feed your Craft! ^^ Then I added the title with some gold embossing. :D 


Once I got the cover done, I made the first recipe page! I've decided to take nice pictures to my favorite food when making it and I'll be building this album little by little. :)


I'll keep using the same structure for each recipe: one little pocket for the name of the recipe, next to it I'll be adding the picture and, on the pocket below I'll write the ingredients and the instructions! I think that this way it will be easy to read it and also to create all the other pages! ^^


On this case, I decided to introduce this blue and also some yollow and gold to make it pop! I love the sweet look it got! I used the Bold Alphabet stamp by Feed your Craft to create the title and my typewriter to write the repipe. Moreover, I added some washi tape and a little bit of stitching to divide the spaces! ^^


I really like how these first pages turned out and I can wait to create some more! That way I will have and excuse to cook more of my favorite foods! ^^ Also, I hope you got inspired to create your own and have fun cooking and crafting! :D

Best wishes! ^^

Sunday, August 6, 2017

Mini Álbums Innsbruck! ^^

¡Muuuy buenos días a todas! ¿Como va el verano? Yo lo estoy aprovechando para hacer scrap y documentar fotos de todo el año que se habían quedado en la cola de cosas por hacer jejeje.
Hello everybody!! How are you doing? I'm making the most of my summer holidays to scra some pictures from the year that had been waiting on the to do list! :P 


En este caso os quiero enseñar dos mini álbumes que hice de un viaje con mis amigas a Innsbruck! Nos lo pasamos super bien y pensé que lo mejor que podía hacer para recordar todos estos buenos momentos era regalarles un pequeño álbum con las fotos más representativas. :D
On this case, I want to show you a mini album I made of a trip with my friends to Innsbruck! We had a really great time and I thought that the best way to remember all this good moments was to give each of them a cute tiny album with the most representative pictures. ^^  


Para la estructura me he decantado por algo sencillo pero vistoso. He creado una portada con mi papel favorito de la coleccion Bohemian Soul de Sweet Möma que recoge todo el álbum que tiene estructura de acordeón. Es una encuadernación divertida y fácil de hacer que os puede servir perfectamente para hacer regalos o para recordar eventos bonitos! ^^
For the structure, I decided to do something simple but attractive. I've created a cover with my favorite paper from the collection Bohemian Soul by Sweet Möma to hold an accordeon book. It's an easy and fun binding that can be very useful to make a present or to document little events. :) 


A continuación, os dejo con los detalles de las páginas interiores, en las que he usado papeles de la colección Serendipity de Dear lizzy para American Crafts, otros recortes de colecciones como la Take me Away de Paige Evans para Pink Paislee y sellos de Feed your Craft y Lora Bailora. ^^
Next, I'm showing you the inside pages where I've used papers from Serendipity by Dear Lizzy for American Crafts, some scraps from the Take me Away collection by Page Evans for Pink Paislee and some stamps from Feed your Craft and Lora Bailora. :D


Y aquí podéis ver cómo queda el álbum desplegado, ¿qué os parece? ¡A mi me encanta1^^
And here you can see the album unfolded, what do you think? I love it! :P


Finalmente, para cerrarlo me decanté por un cierre estilo sobre que ya decora la portada y le da un toque viajero muy sutil! :D
Finally, I closed the mini album with a mailing closing that decorates the cover and algo gives it a subtile traveling touch! :)


¡Espero que os haya gustado mucho y que os sirva para los mini álbumes que van a salir de todas las fotos bonitísimas que estamos haciendo este verano! ^^ 
I hope you liked it and that it inspired you to keep all your memories and beautiful pitures of this season! ^^

¡Que seáis muy felices!
Best wishes!